
If you're one who enjoys a good DIY project, or if you're just tired of paying exorbitant labor fees to have your vehicle serviced every 5,000 miles, changing your own oil can be a rewarding endeavor. Even though cars and trucks are becoming increasingly over-engineered these days, manufacturers generally see to it that the basic maintenance items can still be taken care of in your driveway with a few common tools.
Before I became a writer for WonderHowTo, I was an ASE-certified automotive technician for well over a decade. As the manager of several lube shops throughout my career, I trained countless technicians to change oil—and let me assure you, many of these folks started off with absolutely no automotive knowledge, so the "professionals" at your local oil change shop don't necessarily have any more experience than you do right now.
Really, changing your own oil is just a matter of being prepared with the right tools, and being aware of any nuances that you might encounter. So if you've got the gumption, I'll do my best to educate you on all of the finer details below.
Step 1: Purchase the Right Oil & Oil Filter
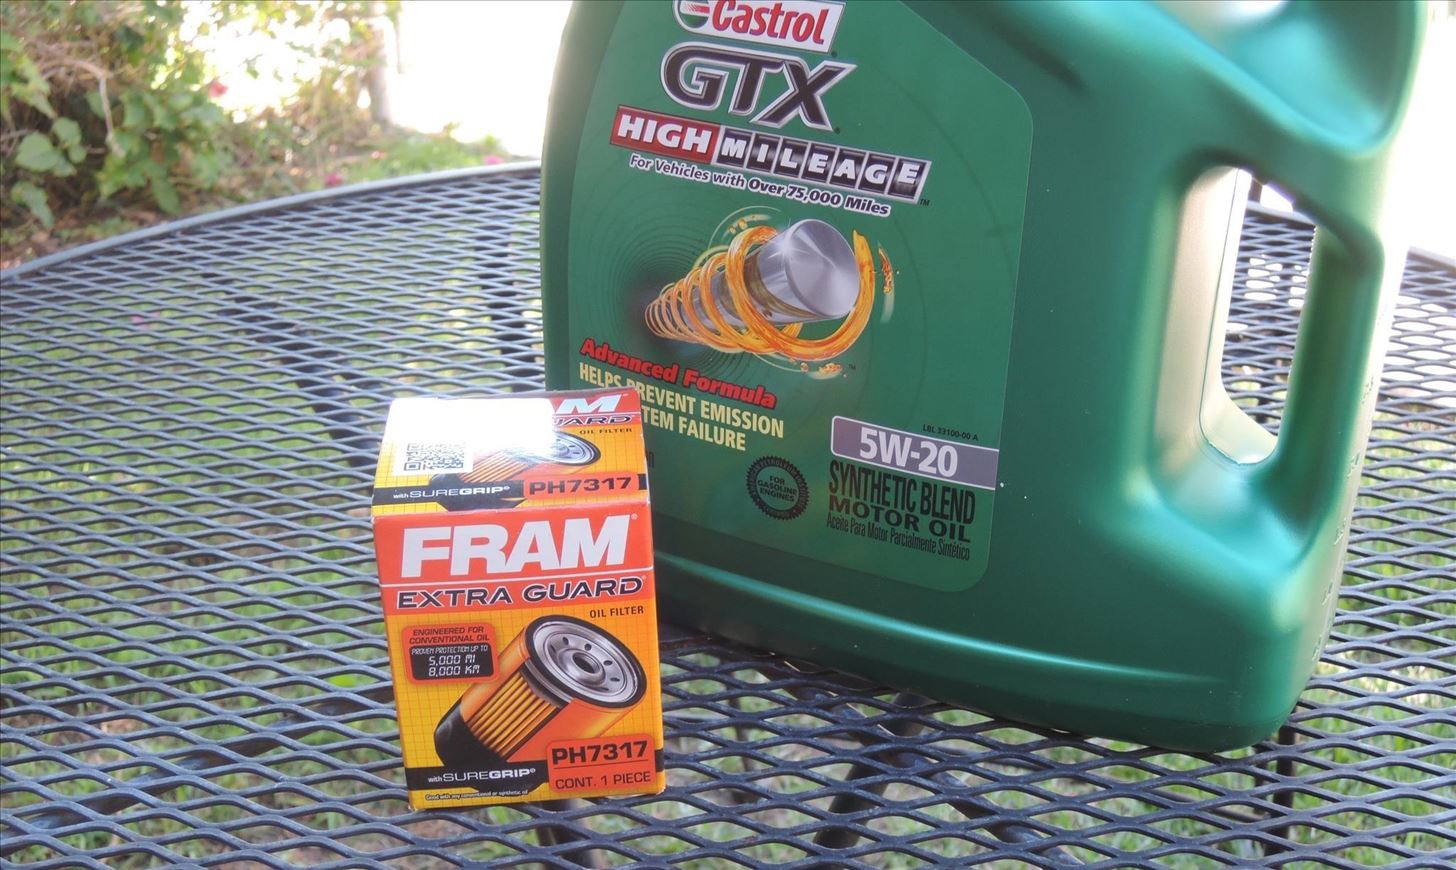
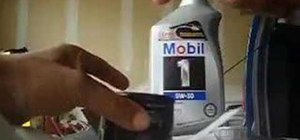
Of course the first step in changing your own oil will involve a quick trip to the auto parts store, but before you head out, make sure to bring your owner's manual with you. This is because it's very important to get the proper oil type with the right viscosity, and these specifications will be listed in the "Engine Oil" section of your owner's manual.
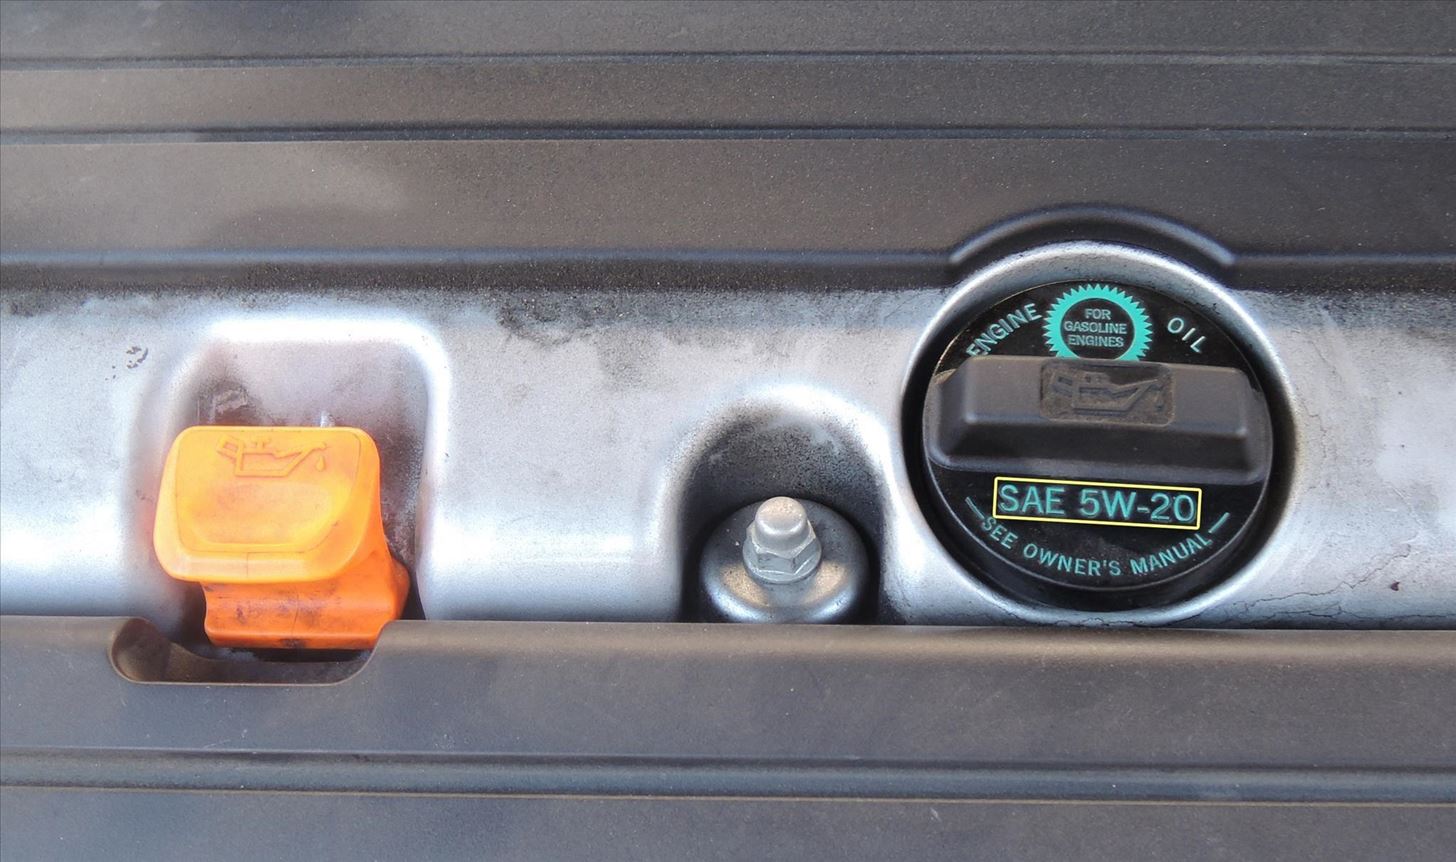
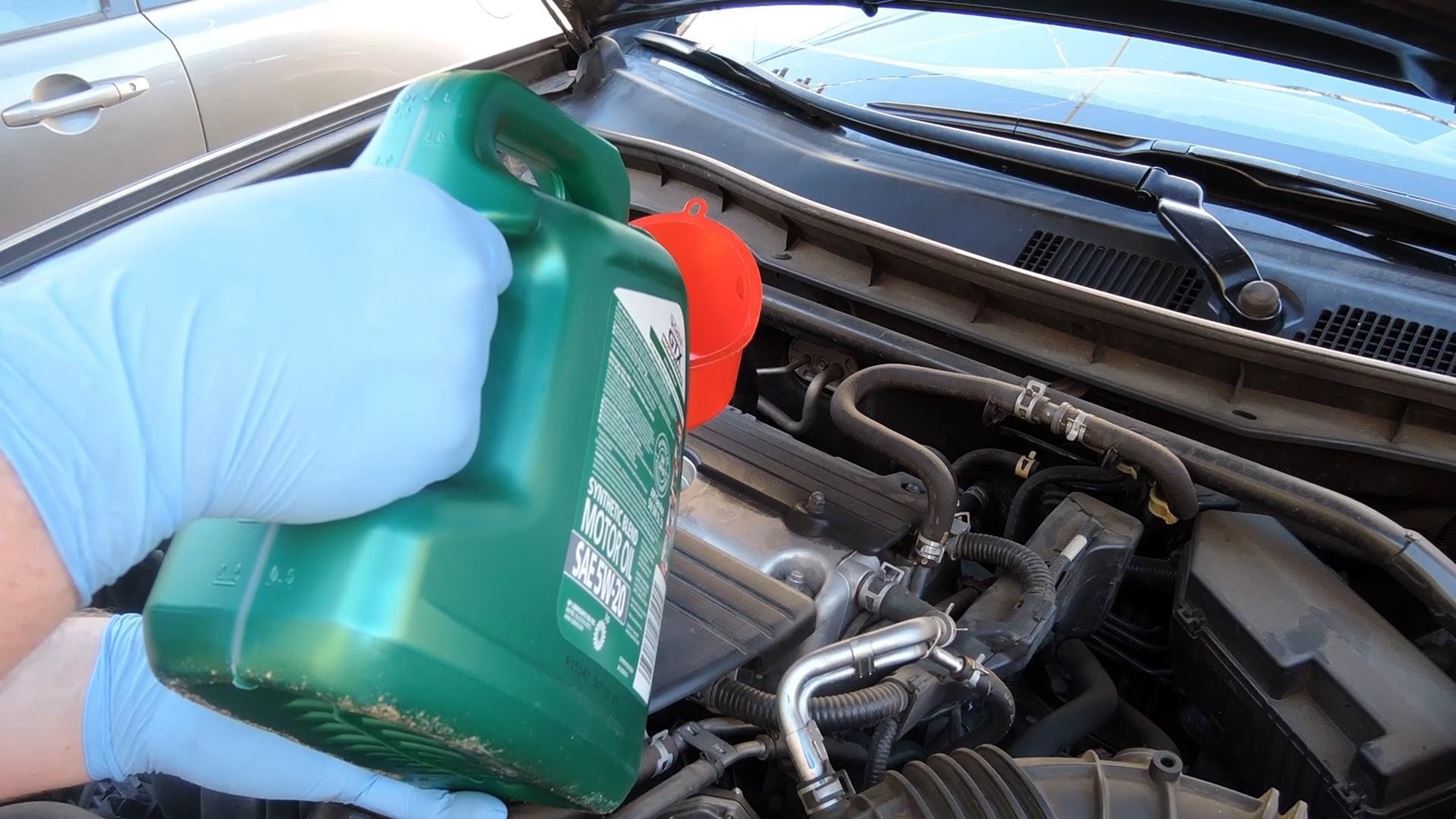
In general, most cars these days take either a 5W-20 or a 5W-30 weight oil, and a lot of times, you'll find this information listed on your oil cap. But some cars recommend using a synthetic or synthetic blend oil, and some manufacturers even go so far as to require one of these oil types while your car is under warranty. The owner's manual will list this information, along with the amount of oil your engine needs, so make sure to read the manual thoroughly before you purchase any oil.
Beyond that, you'll also need to buy an engine oil filter, as these are designed to be replaced at every oil change. In general, auto parts stores will have a catalog with part numbers anchored to their oil filter display, so use this book to find the right oil filter for your vehicle.
You may also want to buy an oil drain plug washer at this time. Some manufacturers—mainly Honda and Toyota—recommend that you replace the drain plug washer at every oil change. The easiest way to handle this would be to head to the parts department at your local dealership and purchase a pack of drain plug washers for around five bucks.
Step 2: Gather Your Tools
Equally important as purchasing the right oil and filter is using the proper tools for the job. But before getting you what you need, keep two things in mind; 1) these are tools that will last you a long time if properly maintained, so consider them an investment, and 2) many auto part stores will lend you tools, often for free, so inquire about that when you're picking up supplies.
Now, for one, you'll need a tool to help you remove the old oil filter, and there are three basic types of these. First is a band wrench (or filter strap), which wraps around the filter with a metal band. Second is a set of filter pliers, which work like your normal household pliers, but are sized to fit an oil filter.
For beginners, however, I'd recommend using an oil filter cup. These can be either adjustable (pictured below), or sized to fit your specific oil filter. But either way, you'll need a 3/8-drive ratchet and a 3-inch extension to pair with your filter cup.
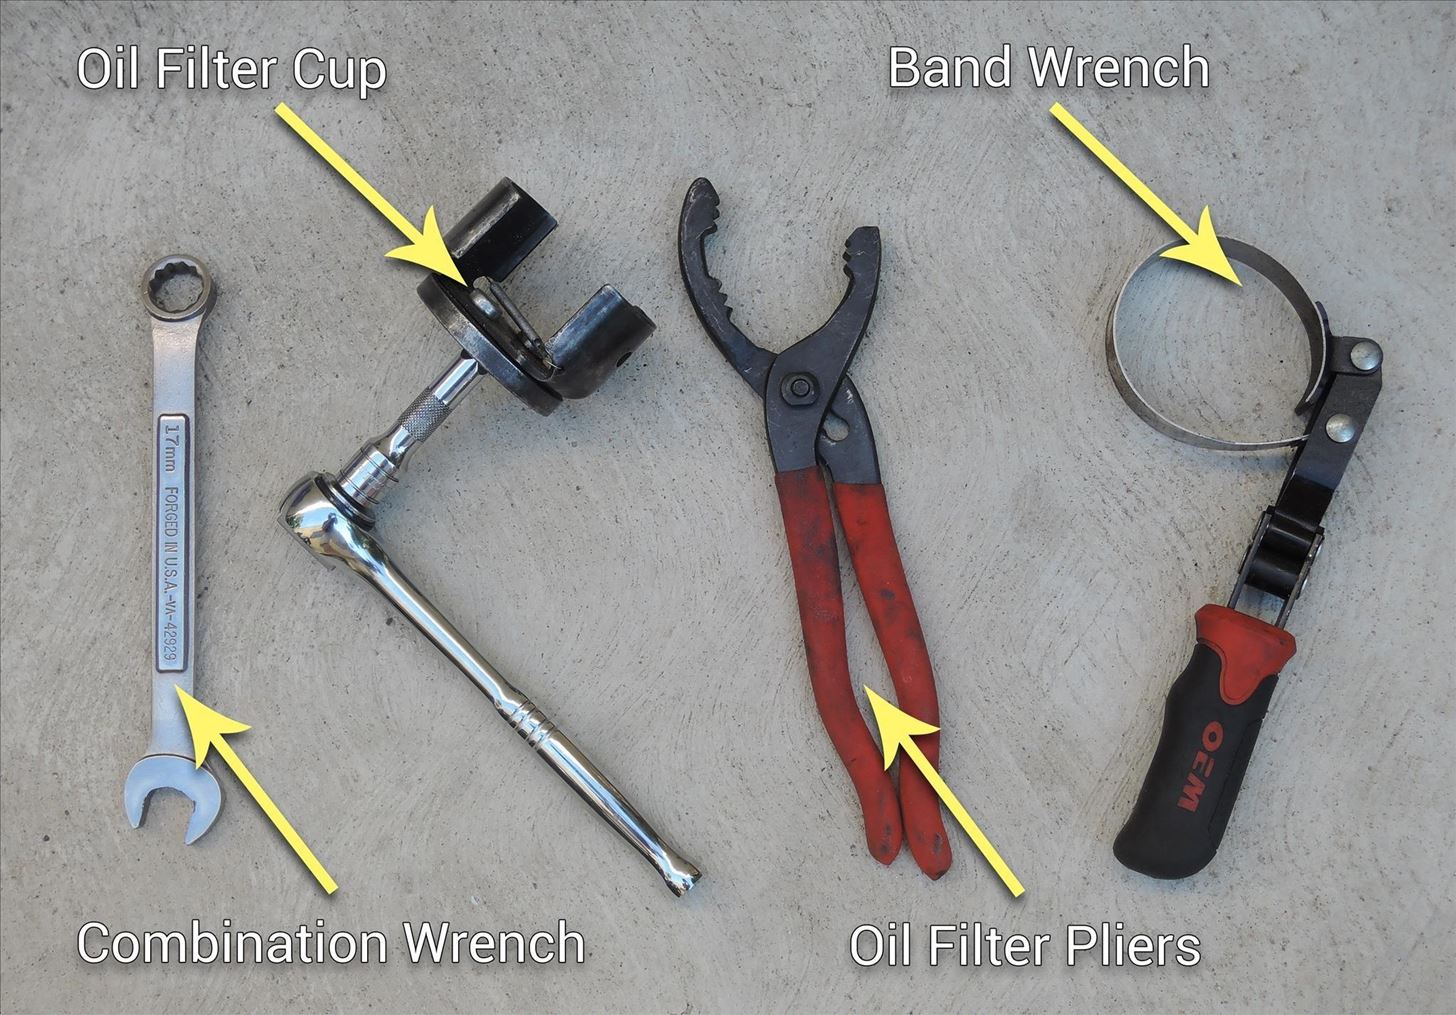
Then, of course, you'll need a tool to use when removing the oil drain plug. Do not attempt to use adjustable pliers, a crescent wrench, or a ratchet and socket to remove your oil plug, as these will easily strip the head of your oil plug. There really is only one type of tool that I would recommend for this job—a combination wrench or box wrench.
Combination wrenches are sized to fit, so you'll need to make sure you have the right one for your oil drain plug. Here are some of the drain plug sizes for common vehicles:
- Chevrolet/GM: 15mm for most models, 13mm for some
- Chrysler/Dodge/Jeep: 13mm for most models, 16mm for some
- Ford/Lincoln/Mercury: 16mm for most models, 13mm for some
- Honda/Acura: 17mm for all models
- Hyundai/Kia: 17mm for all models
- Nissan/Infiniti: 14mm for all models
- Subaru: 17mm for all models
- Toyota/Lexus: 14mm for all models
- Volkswagen/Audi: 19mm for most models, 17mm for some
Step 3: Gather Your Accessories
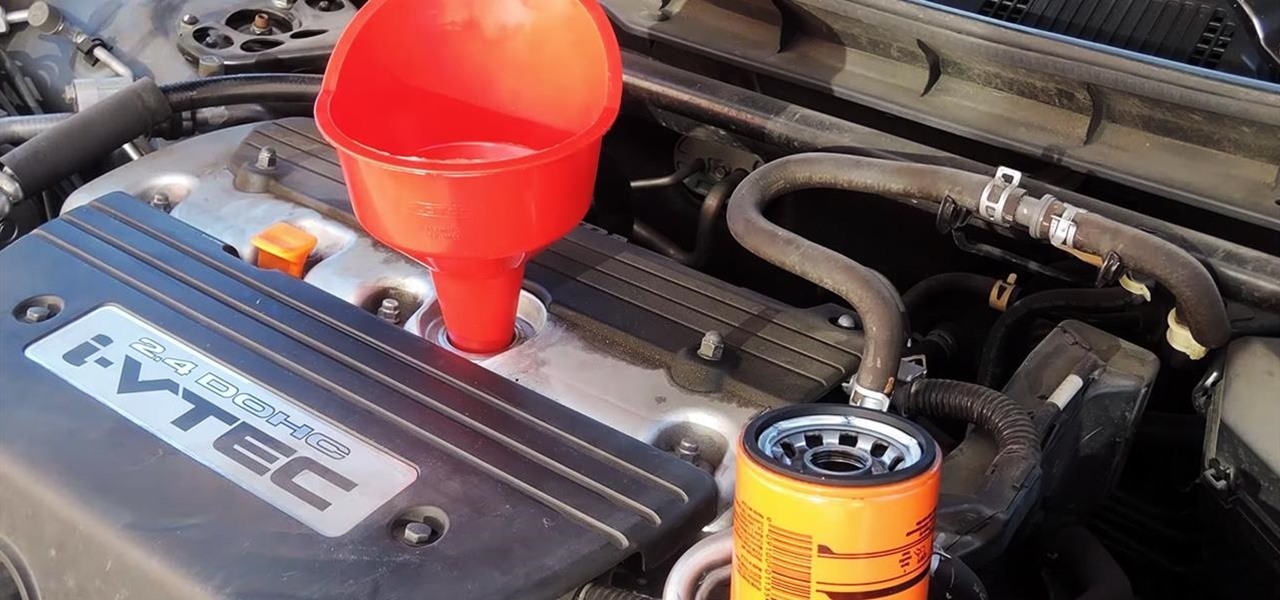
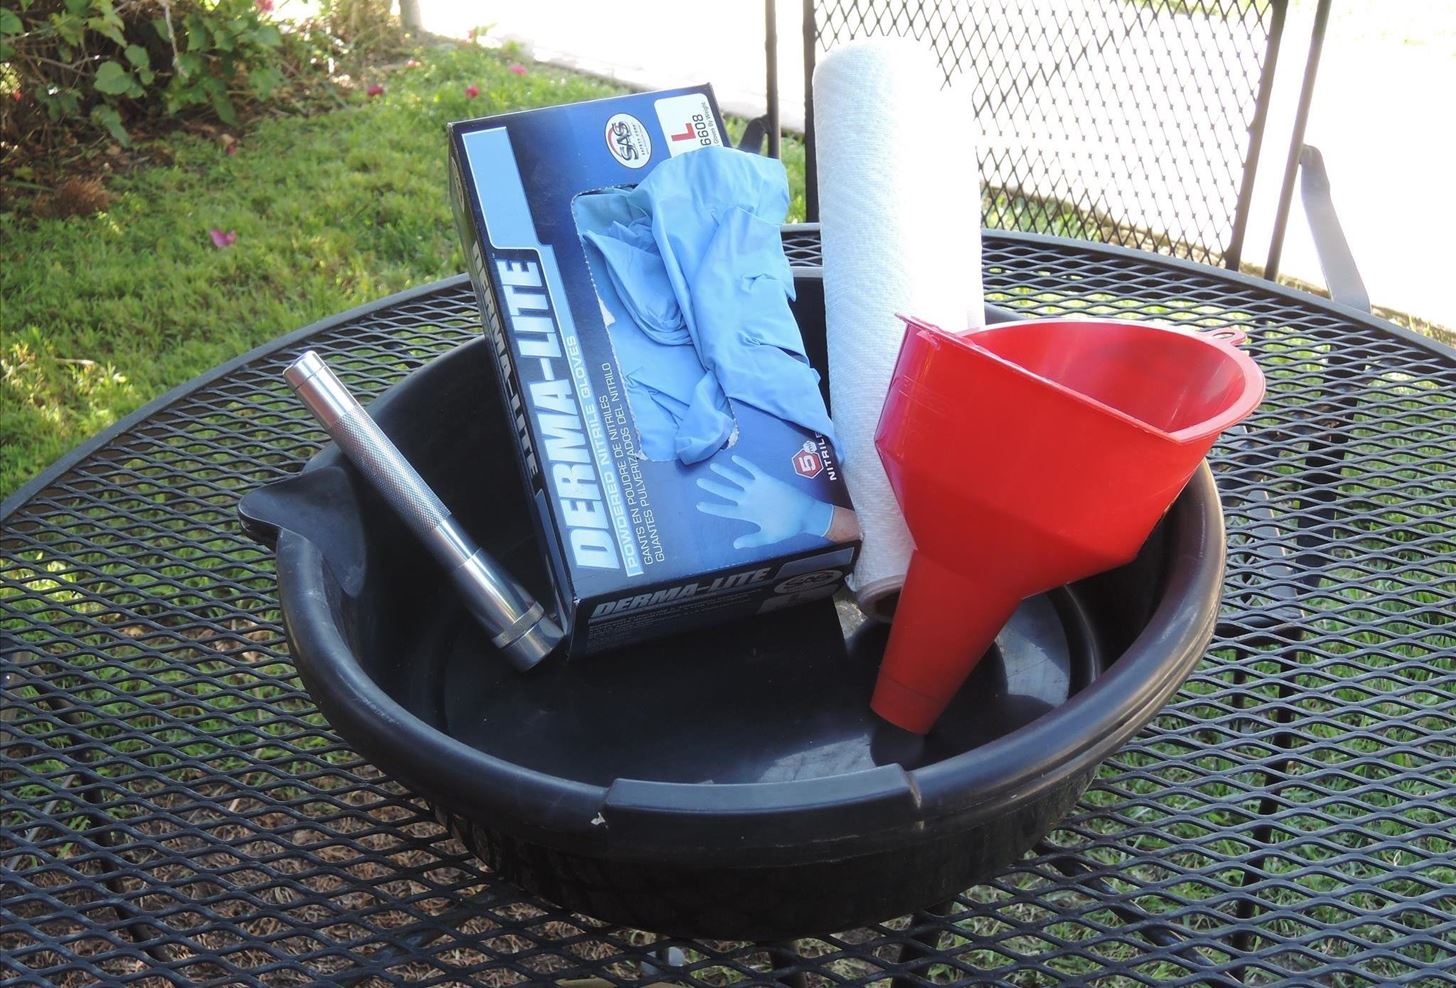
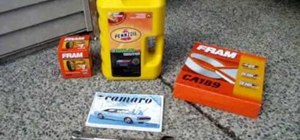
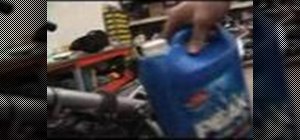
Now that you have the right oil, the right oil filter, and the right tools, the rest of the materials needed should be easy to find. First, you'll need an oil catch pan to collect the old oil, and a funnel to help you add new oil.
I'd also recommend that you buy a box of disposable gloves, as changing your own oil can be quite messy. To help with cleanup, you should definitely grab a roll of paper towels or a few clean shop rags. Then finally, a small flashlight can be of great help when you're underneath your vehicle and things are a bit hard to see.
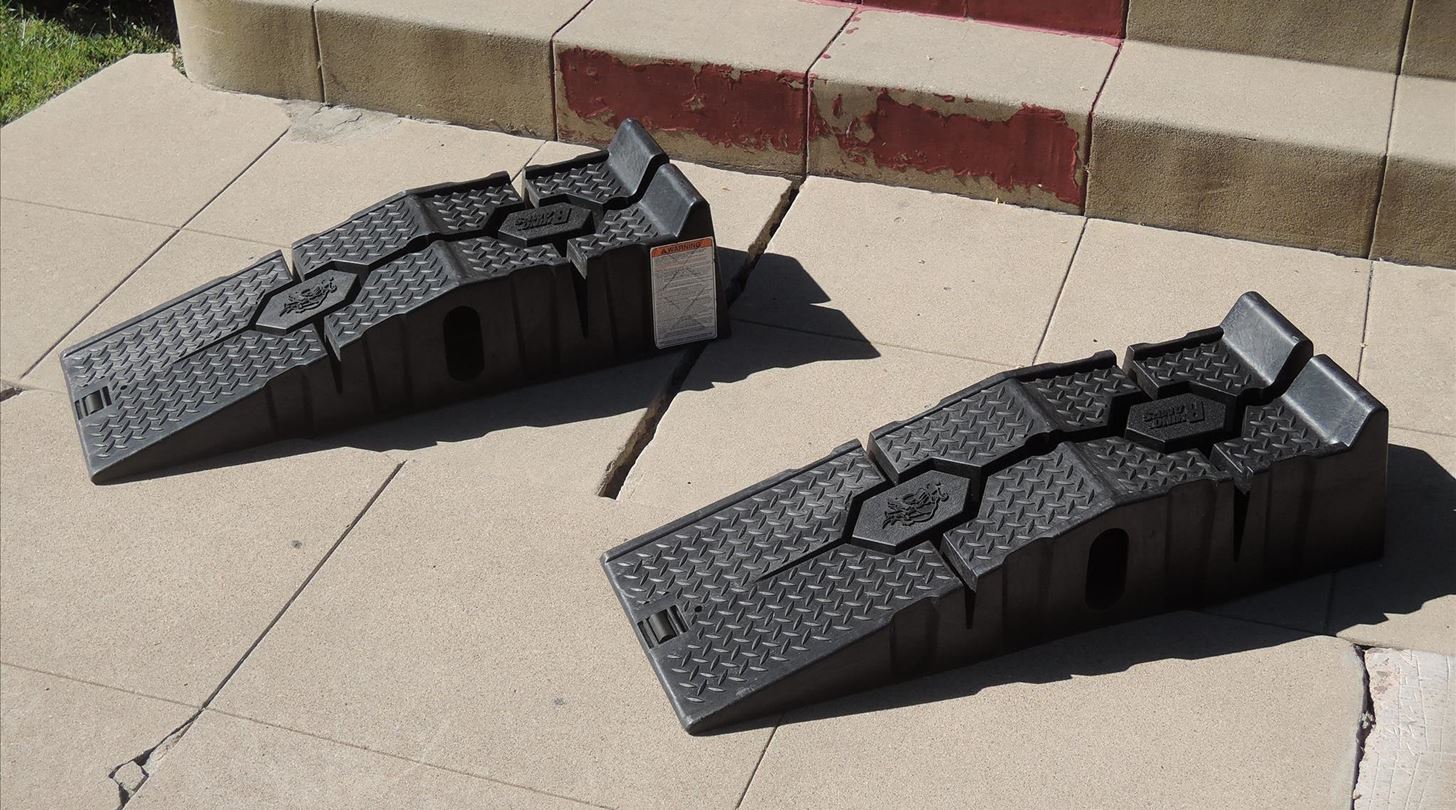
Beyond that, you'll just need something to help you get your car up off the ground. A jack and a set of jack stands would do the trick, but if you don't already own these tools, I'd recommend buying a set of ramps. Ramps these days are made out of hard plastic, so they don't cost an arm and a leg, and in general, ramps are a bit safer than jacks.
Step 4: Prepare Your Vehicle
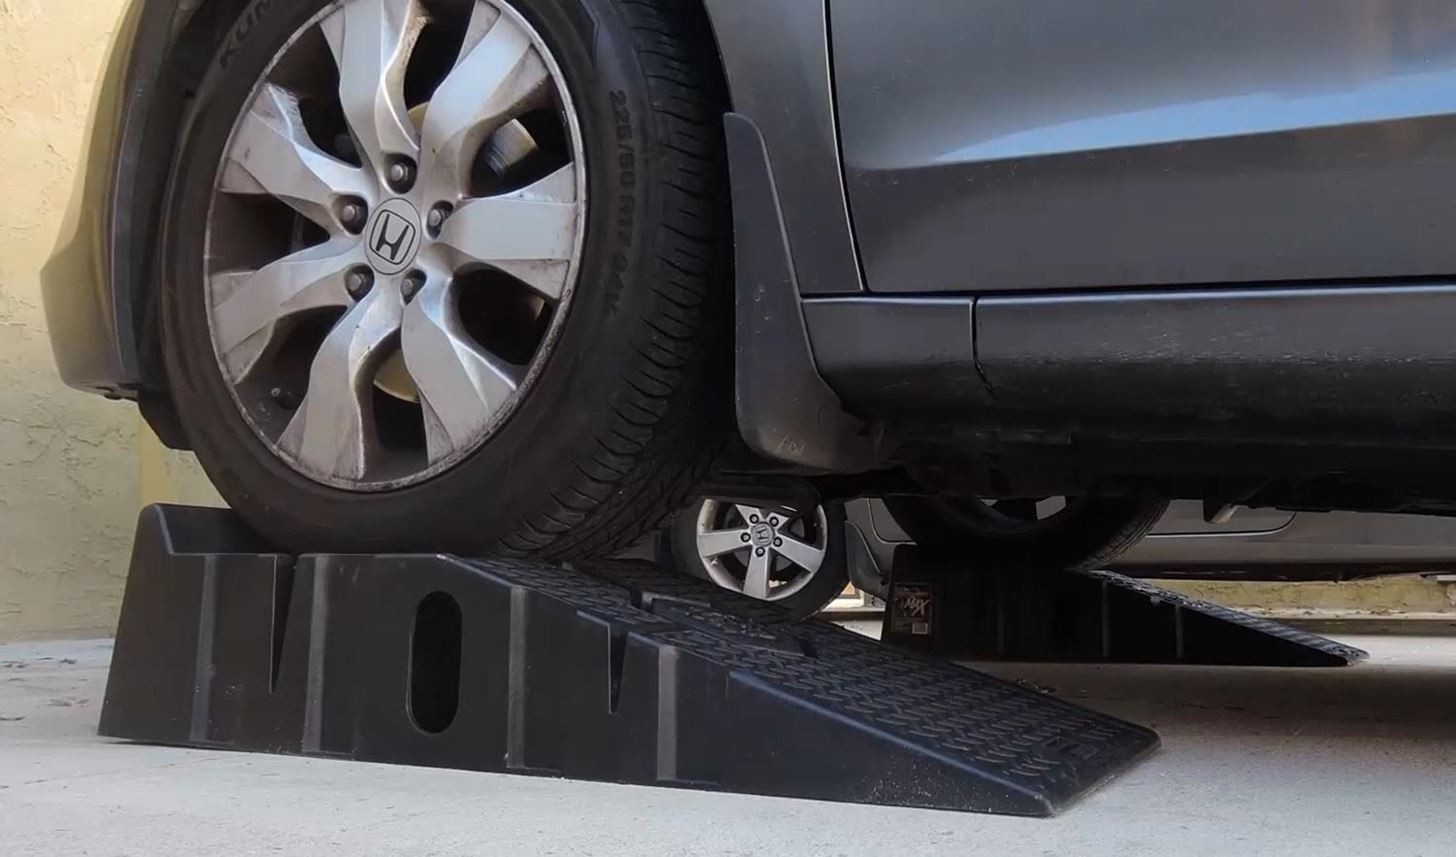
Alright, so now it's time to get down to business. First, position your ramps directly in front of your two front tires, then make sure they are parallel to each other and in a straight line. Next, slowly and steadily drive your car up the ramps until you feel the wheels reach the level surface at the top. From here, put your vehicle in park and apply the parking brake.
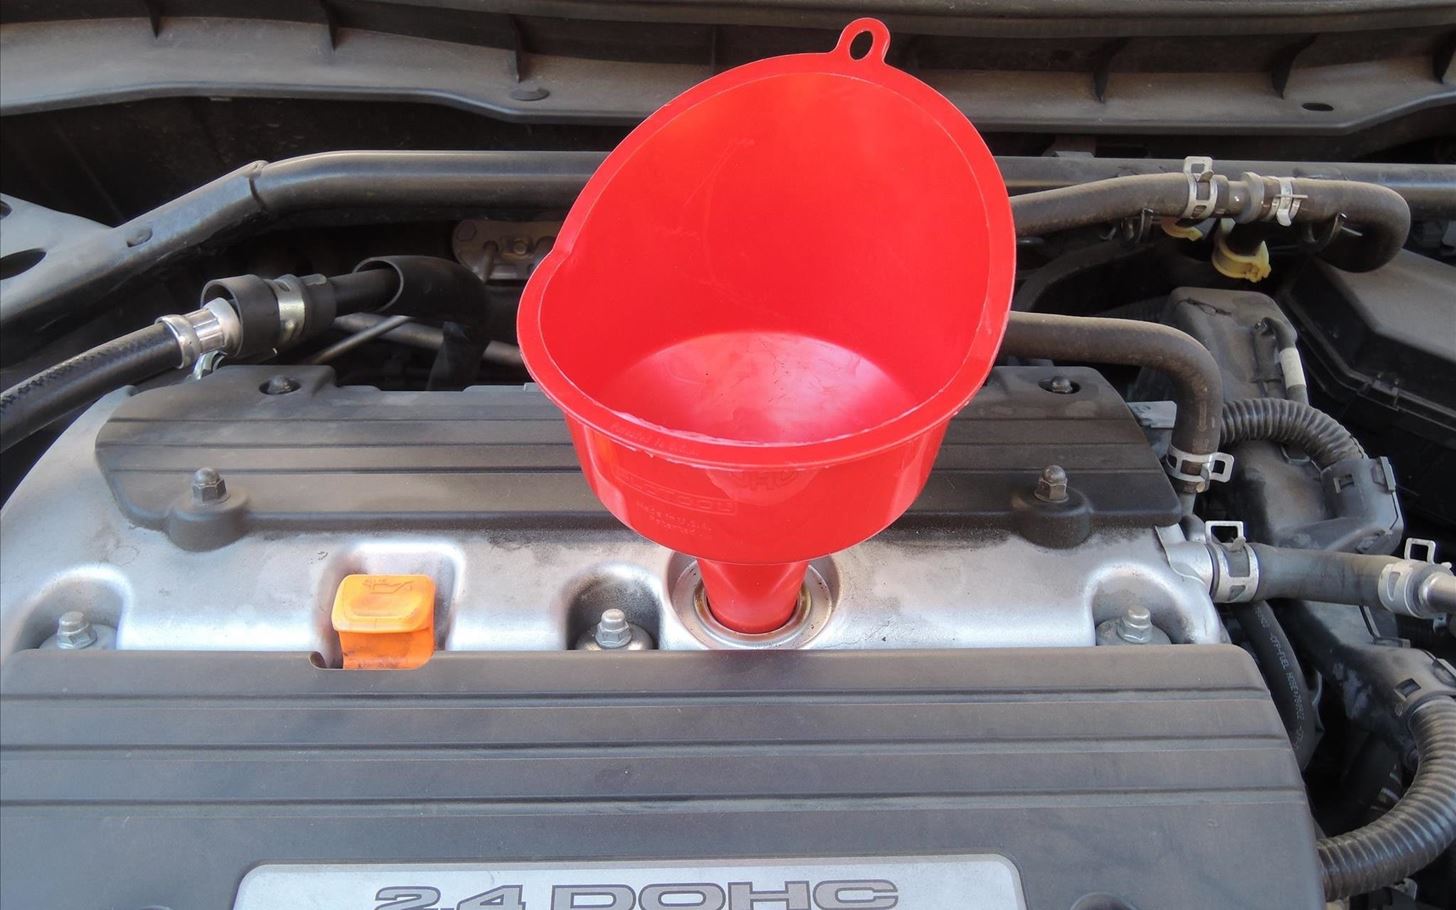
Next, pop your hood and remove the oil cap, placing it safely on top of your hood latch so you won't forget it. From here, insert your funnel, then grab your tools and get ready to head underneath the vehicle.
Step 5: Drain the Old Oil
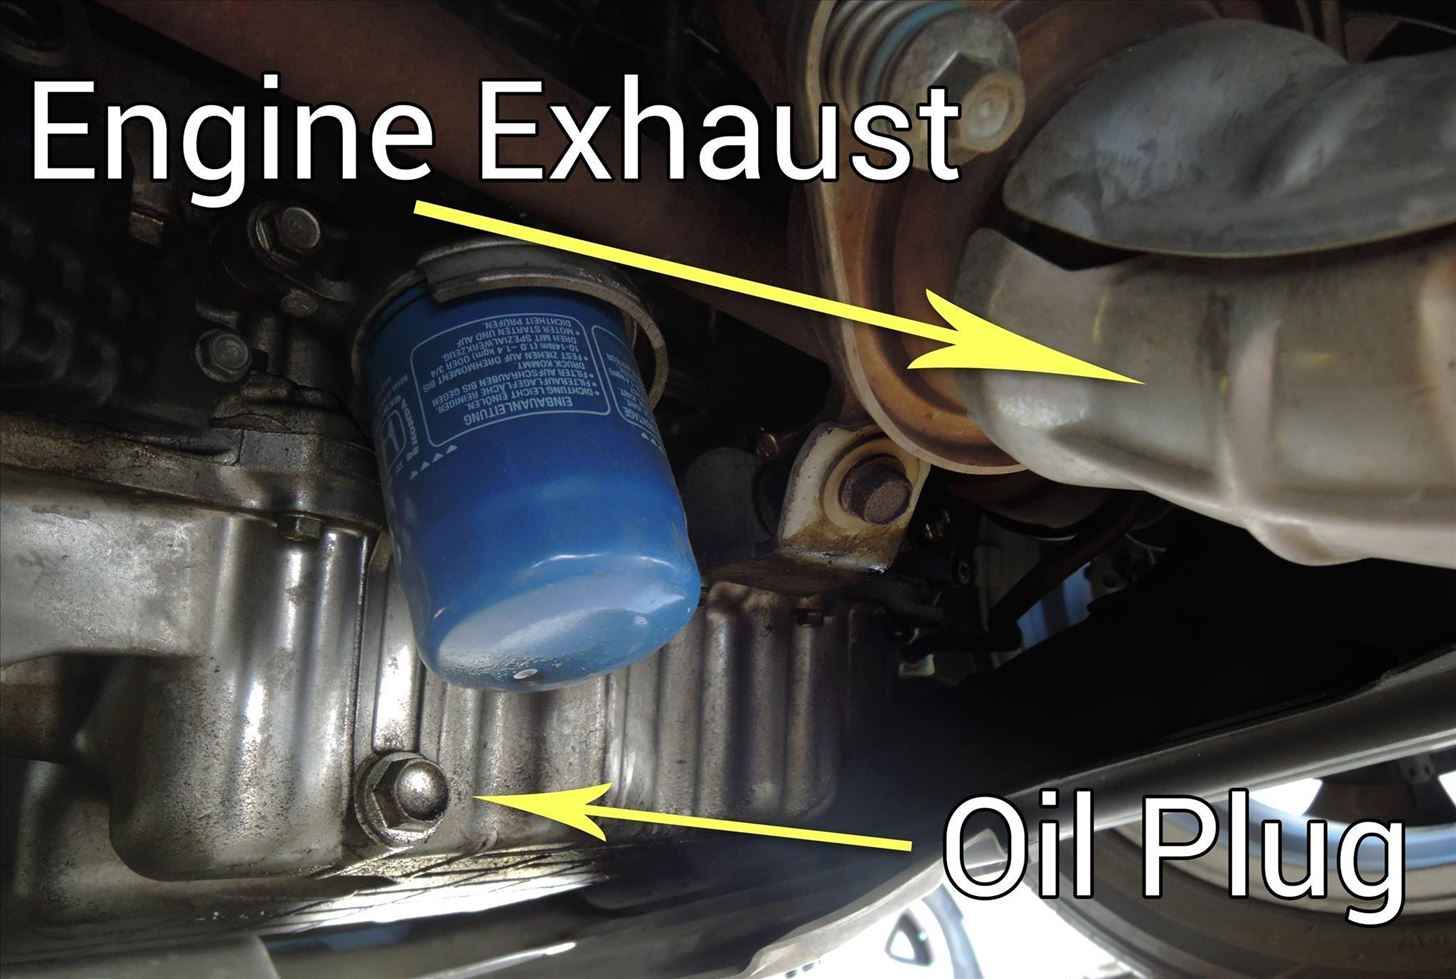
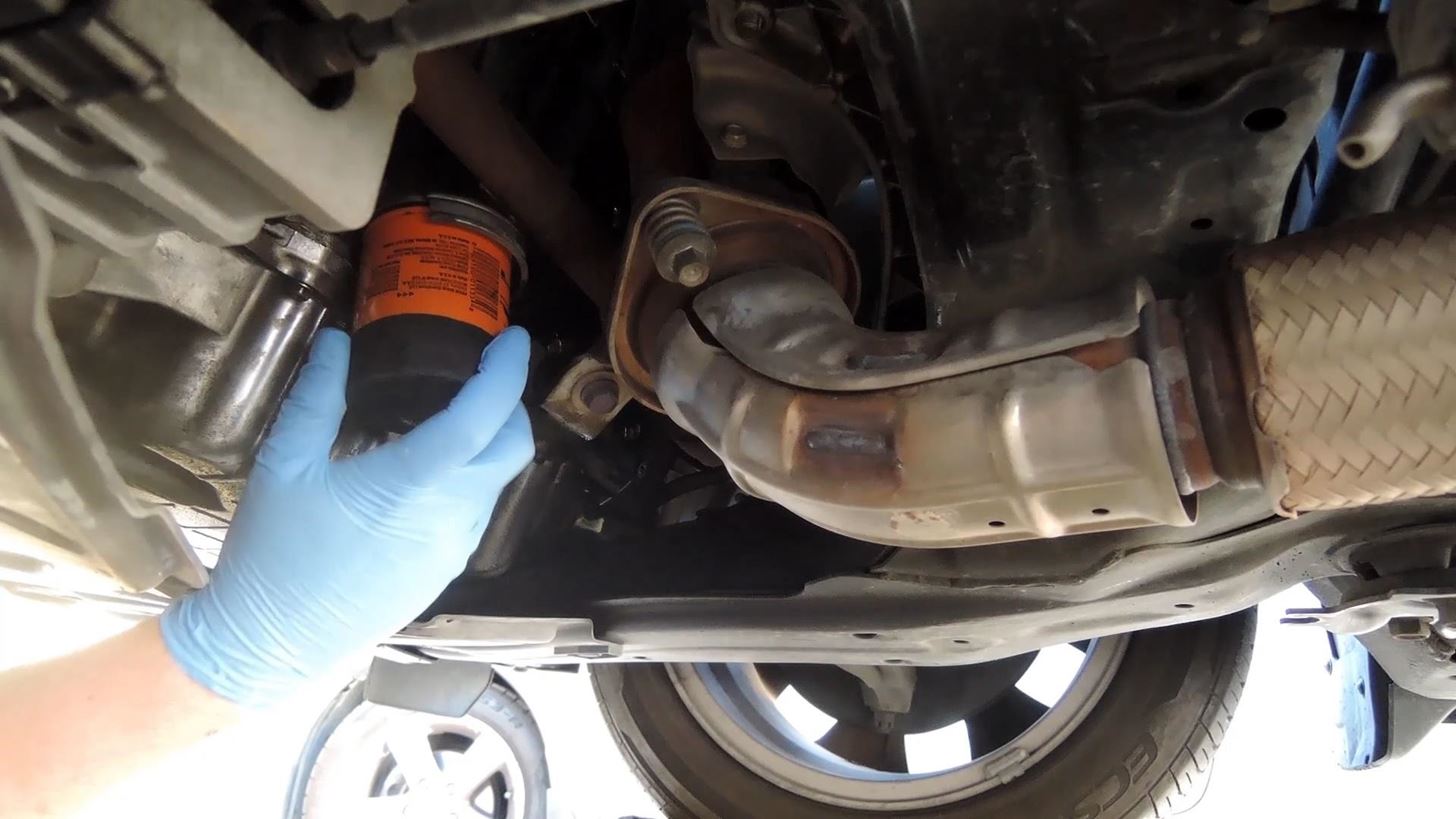
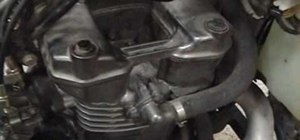
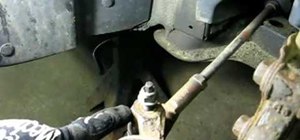
Before you get started, you'll need to identify your oil filter and drain plug. Many cars these days have a plastic skid plate or splash guard that covers the oil filter and drain plug, so you may have to remove that first. Then, it can sometimes be a bit hard to distinguish the oil plug from the transmission plug, and you don't want to make the mistake of draining the wrong one.
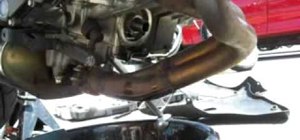
As a rule of thumb, the oil plug is almost always at the very bottom of your engine, and the oil filter is mounted somewhere on or near the engine. With rear-wheel drive vehicles, these are easy to identify, because the transmission is very clearly behind the engine. But with front-wheel drive cars, it's a bit harder, since your engine and transmission are side-by-side. So if you're not sure which one's which, just follow your exhaust pipe back up, which always leads back to the engine.
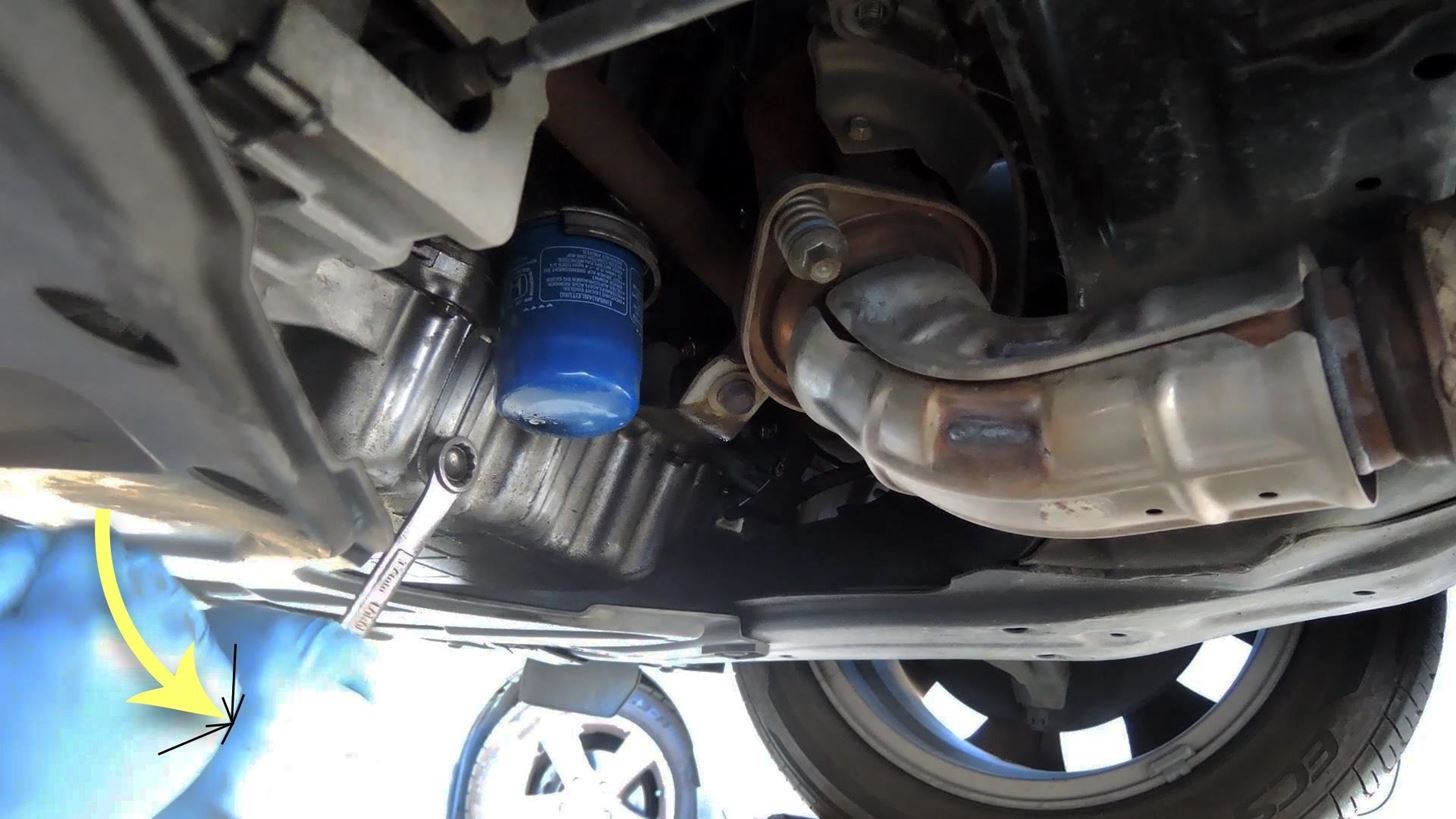
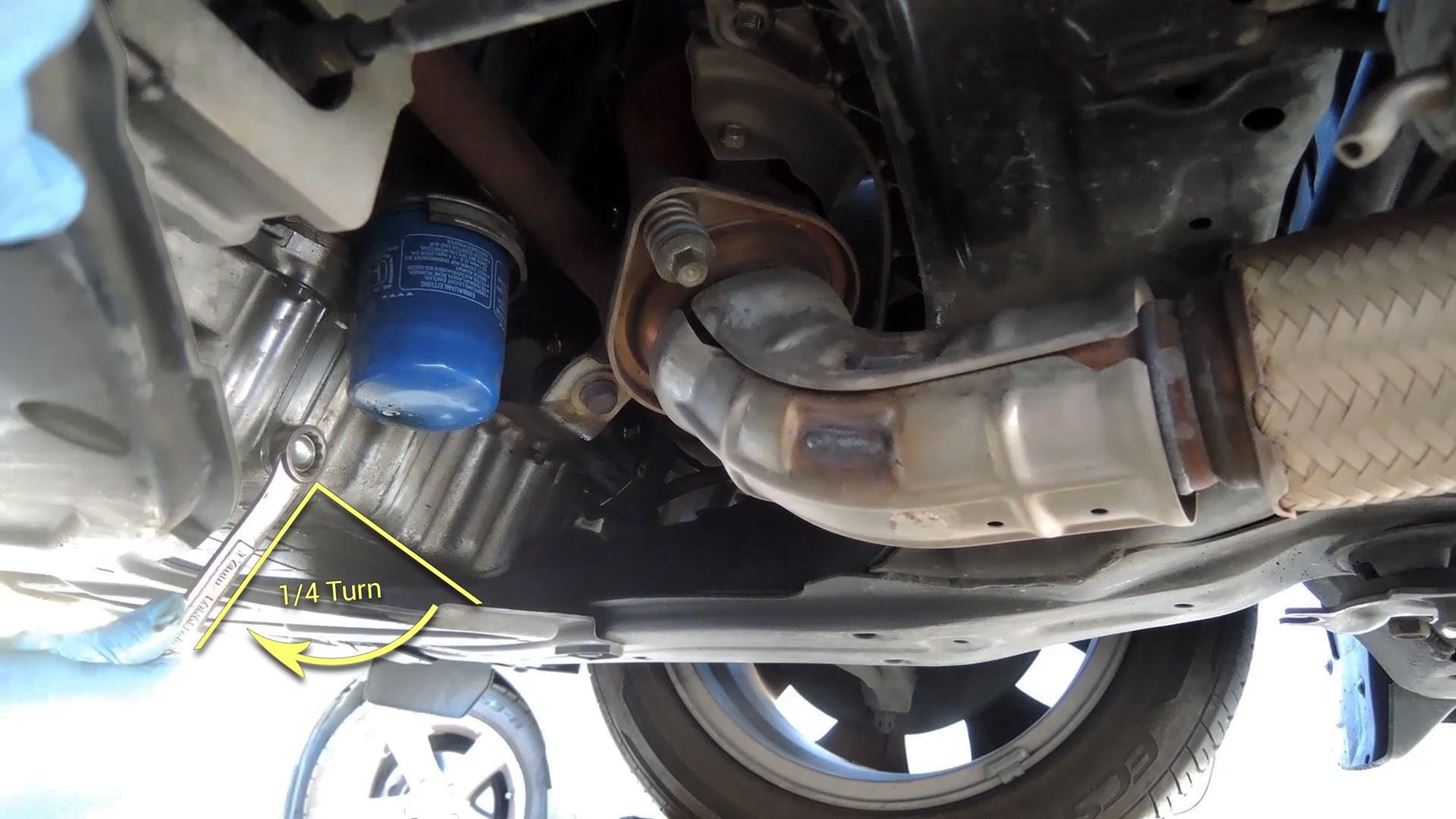
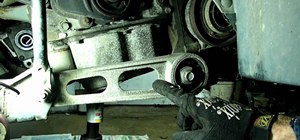
Once you've identified the oil plug, place the box end of your wrench on the plug itself, with the angle in the wrench pointing towards the oil pan rather than away from it. From here, apply steady counter-clockwise force to the end of your wrench using your off hand (non-dominant hand).
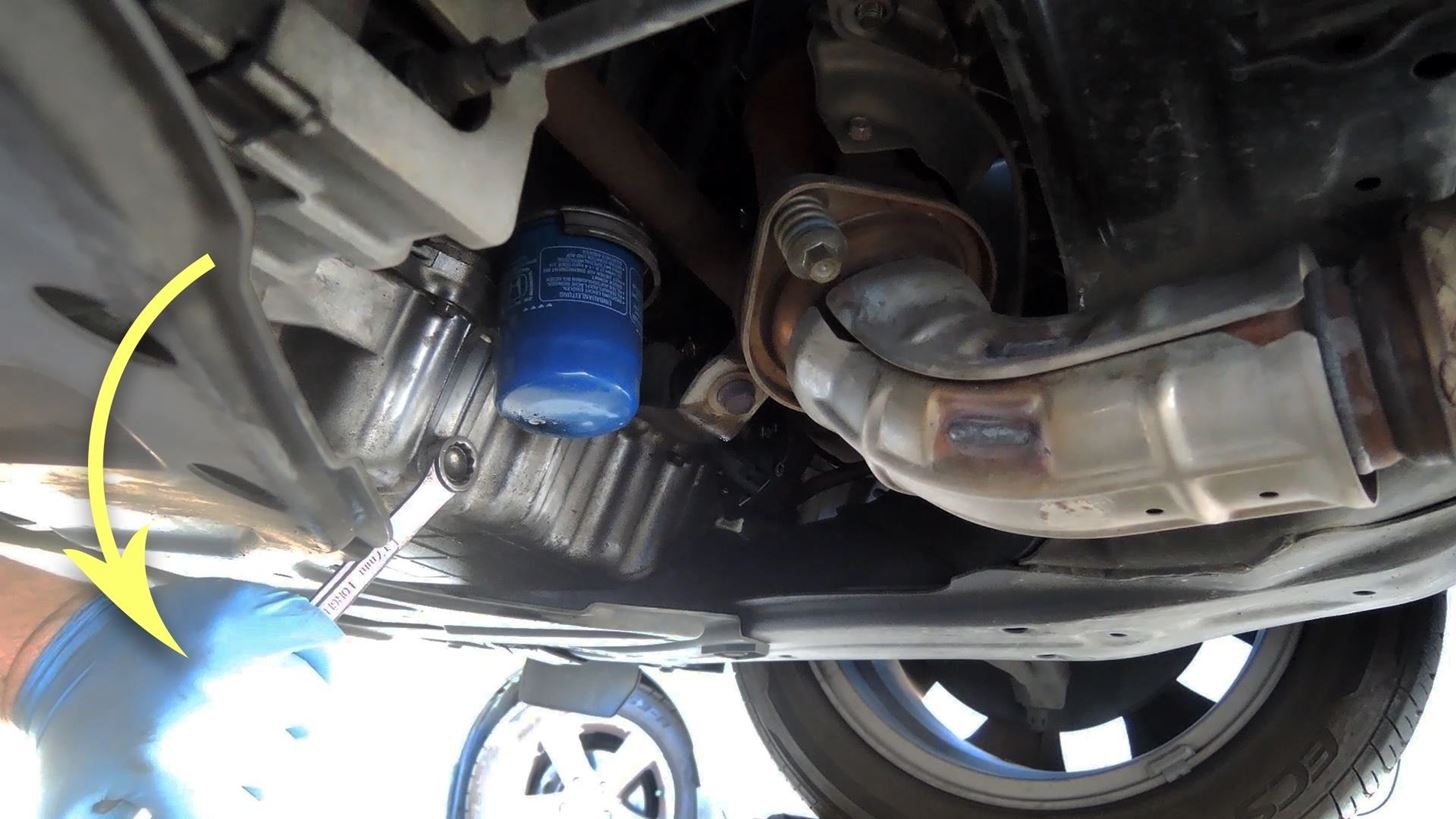
Next, make a fist with your other hand (dominant hand), then smack the back of your off hand with the heel of your fist. It may take a couple of smacks to break the plug loose, but the quick and abrupt force that you're applying here is the best way to free up your oil plug.
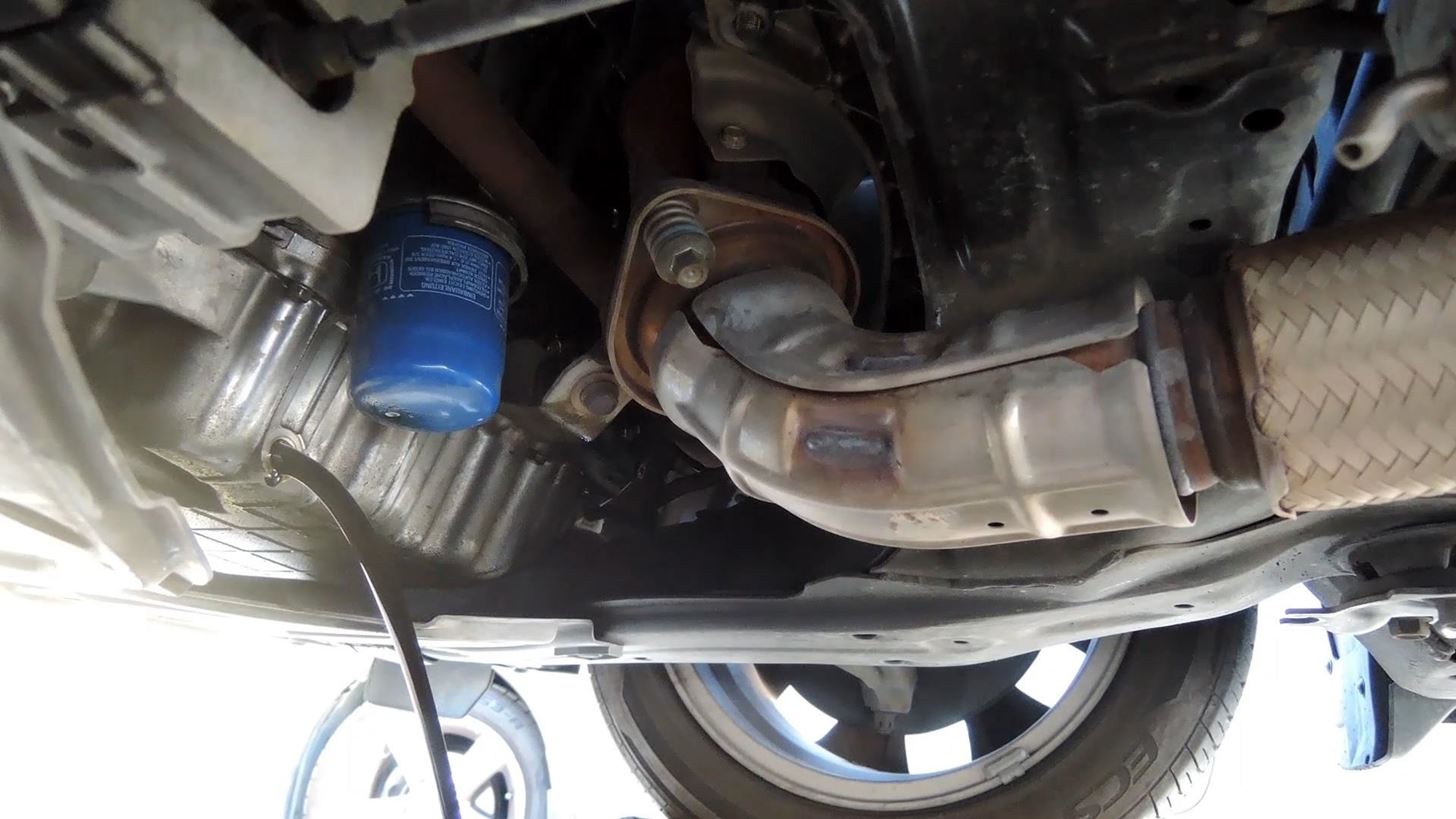
After using that smacking gesture a few times, your wrench should start to move freely. At this point, you should be able to back the oil plug out by hand. But you don't want the plug to fall into the catch pan and get buried by old oil. So, while backing the plug out, use one finger to apply a bit of forward pressure to the head of the plug. When you reach the end of the threads, hold the plug in place while you reposition your fingers, then simply pull the plug away and set it aside. From here, allow the engine oil to drain for 5 to 10 minutes.
Step 6: Replace the Oil Drain Plug
After the engine oil has finished draining, or at least when it's down to a very small trickle, you can go ahead and put the oil plug back in. If you purchased a drain plug washer, now would be a good time to swap it out for the old one. Screw the plug in until it makes contact with the oil pan, then use the box end of your combination wrench to apply an additional 1/4 to 1/2 turn. Be very careful to not over-tighten the plug, as this can strip your oil pan threads and cost you hundreds of dollars.
Step 7: Remove the Old Oil Filter
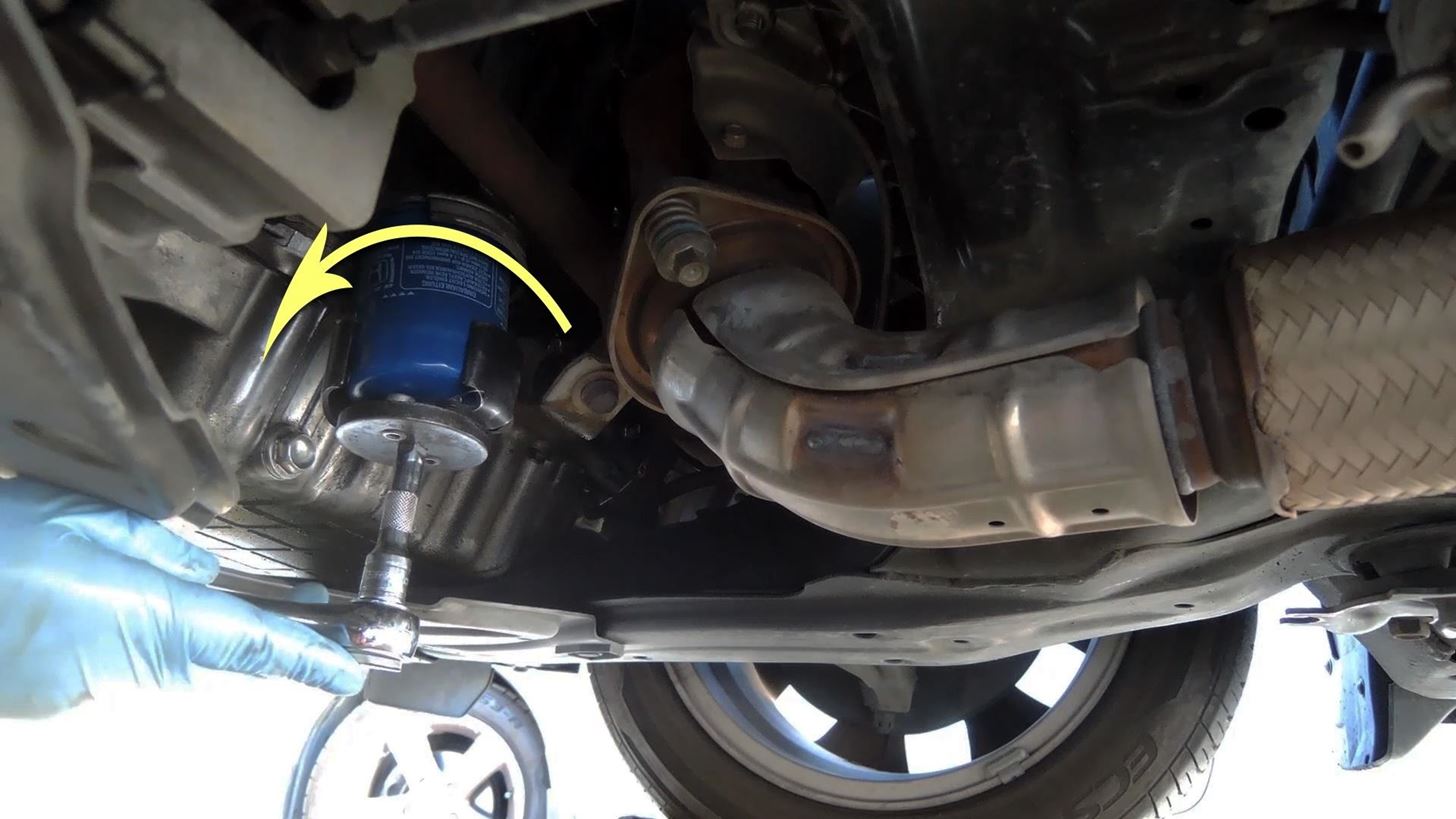
Now that you've drained your oil pan and engine, you can reposition your catch pan directly underneath your oil filter. From here, if you're using filter pliers or a band wrench, make sure to grab the oil filter by its base. Otherwise, if you're using a filter cup, attach the cup to the top of the oil filter.
From here, apply steady counter-clockwise force to the end of your ratchet or oil filter tool. After about a half of a turn, you should notice that the filter begins moving freely, so detach your filter tool and do the rest by hand. When the filter gasket breaks free of the baseplate, you'll get a small gush of oil, so allow that to drain off for a few seconds. Finally, just like with the oil plug, apply a bit of forward pressure with one finger while unscrewing the filter. When you reach the end of the threads, reposition your hand and remove the oil filter, then set it aside.
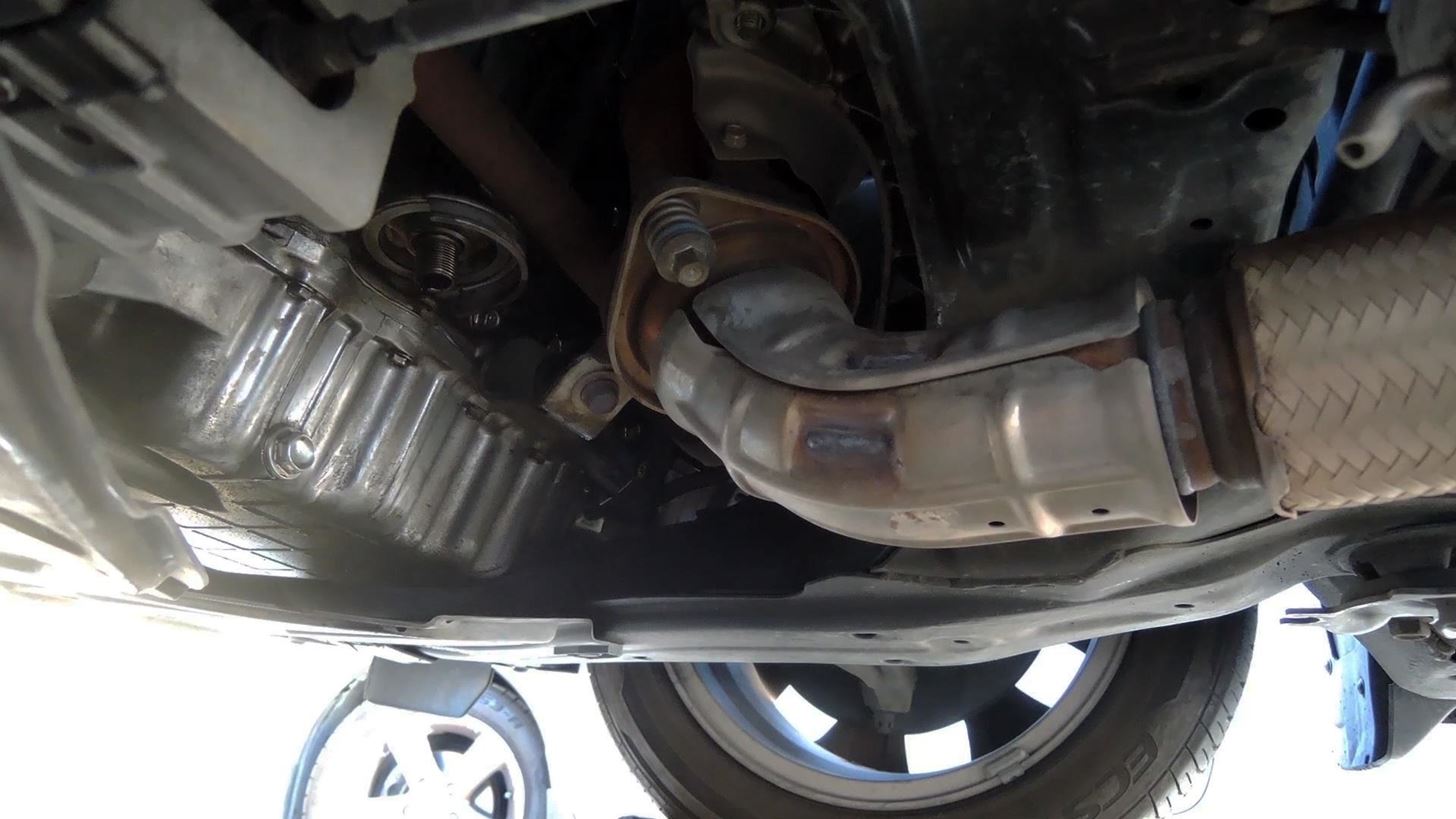
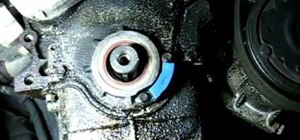
Next, allow the filter housing to drain for a minute or two. Once drained, wipe the baseplate clean with a paper towel or shop rag to make sure it's free of debris, then clean up the surrounding areas as well.
Step 8: Replace the Oil Filter
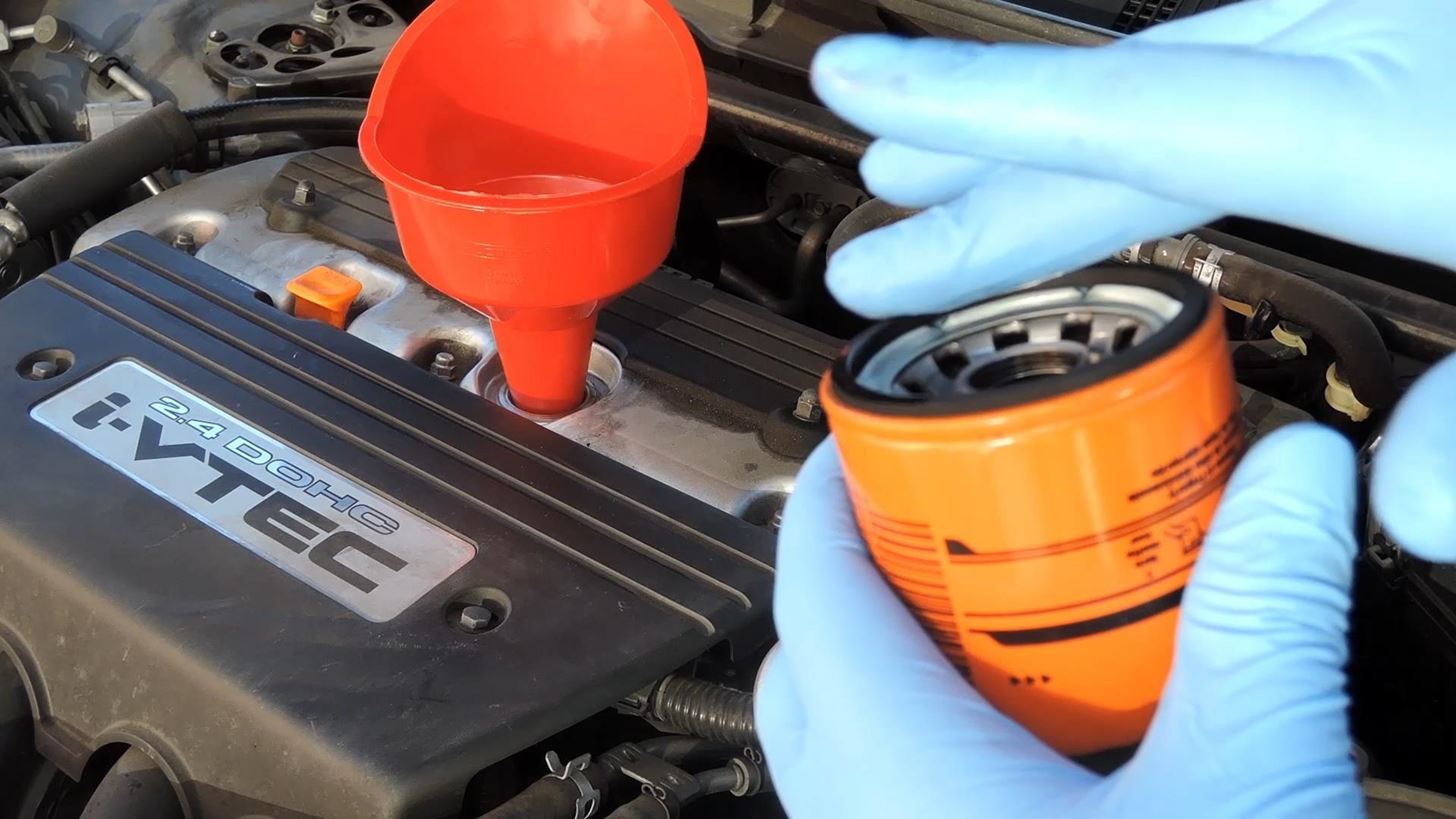
At this point, you're just about ready to wrap up the work underneath your vehicle. But before you slap the new oil filter on, take a second to dip your gloved finger into a quart of fresh oil, then apply this oil to the rubber gasket on your new oil filter. This practice has two main benefits—it will ensure that your oil filter makes a good seal with the baseplate, and it will make taking this oil filter back off in 5,000 miles a lot easier.
Next, go ahead and screw the new oil filter on by hand. Don't use any tools to tighten your oil filter, since this can damage the gasket, spindle threads, and even puncture the filter itself. Once the filter makes contact with the baseplate, give it another quarter to a half turn by hand—what I like to call "Three-finger tight."
Step 9: Add Oil
Next up, refer to your owner's manual to get the full oil capacity for your engine, then go ahead and pour the oil in through your funnel. If you're not 100% about the amount of oil you need to add, I'd recommend erring on the side of caution and under-adding to begin, since it's a lot easier to add a bit more later than it would be to take some back out.
When you're done here, wipe off any excess or spilled oil, then pull your funnel out and replace the oil cap.
Step 10: Perform a Leak Check
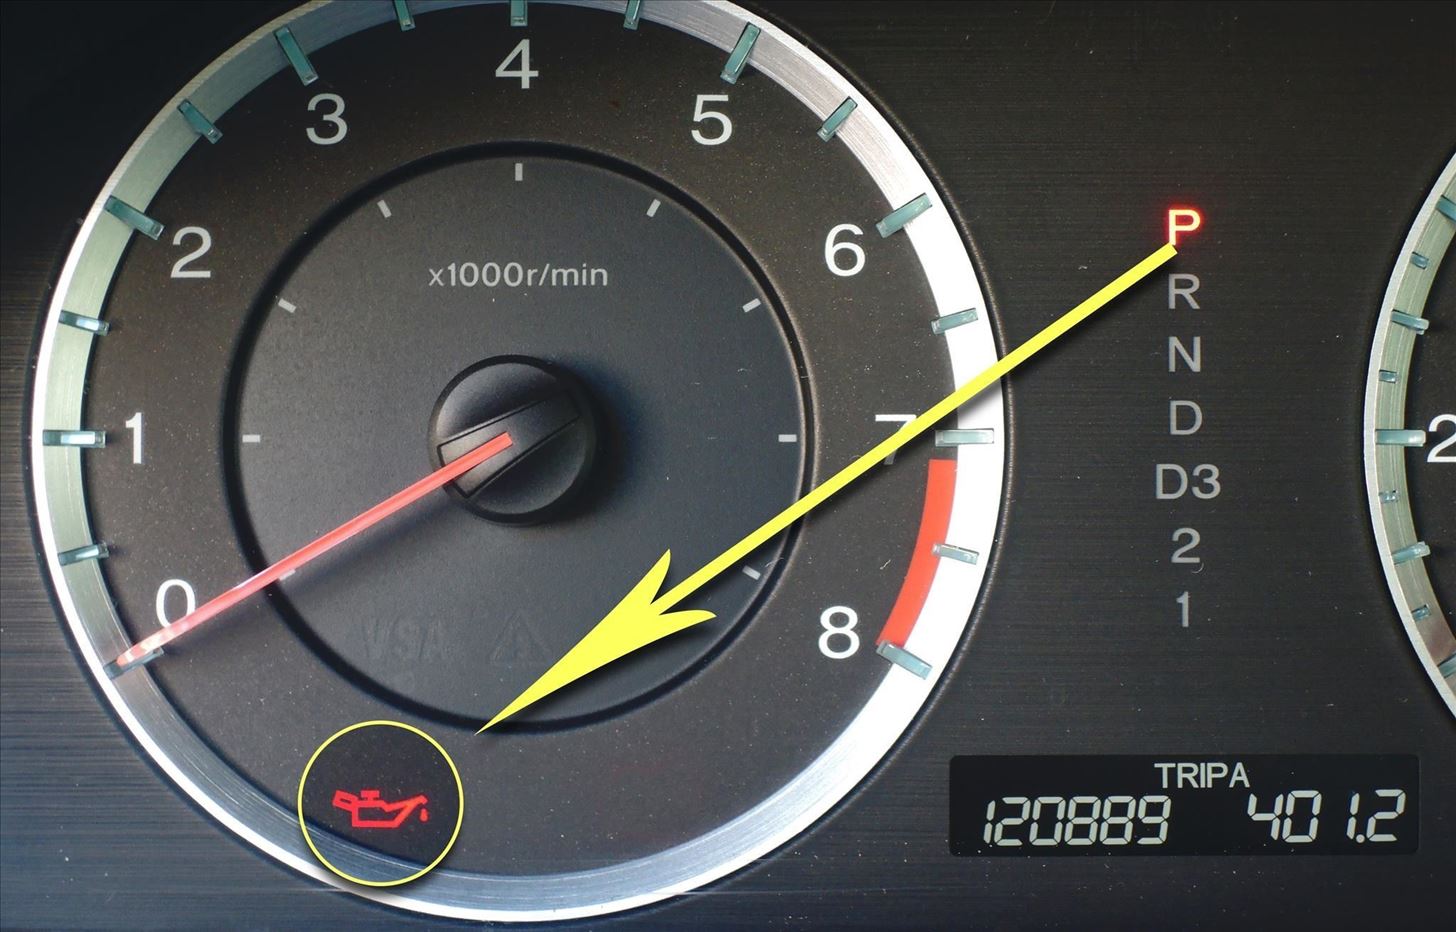
Next, it's time to double-check your work. First, start your engine, then make sure that the oil pressure light on your dashboard turns off within 5 seconds. This light will be red, and shaped like an old-style oil can with a drip coming out of the front.
While your engine is still running, step out of the car and take a quick peek under your vehicle to check for leaks. Pay close attention to the oil filter and drain plug, and make sure there aren't any drips.

Step 11: Check Oil Level
Next, back your car off of the ramps and pull it onto a level surface. From here, shut your engine off, then pull out the oil dipstick and wipe it clean. Your vehicle might have 2 or more dipsticks under the hood, but the oil dipstick is generally yellow or orange, and with most cars, it will have the same icon on it as the oil pressure light on your dashboard.
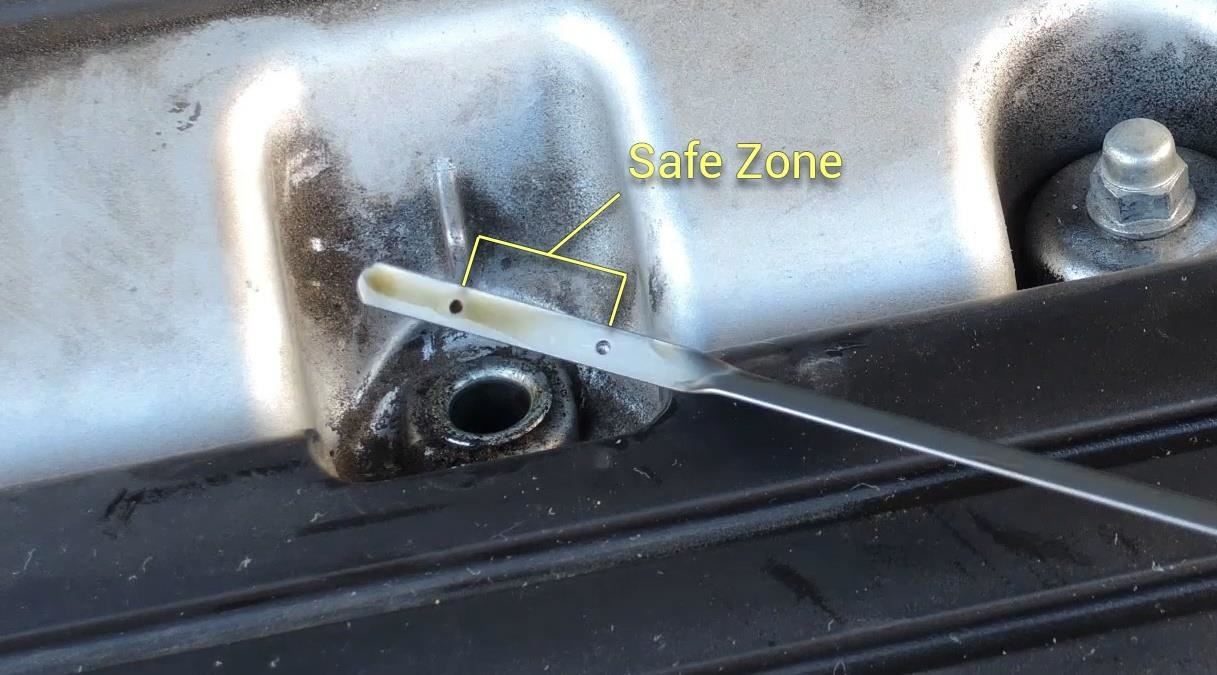
After wiping the oil dipstick clean, go ahead and fully re-insert it. Next, pull the dipstick back out, then make sure that the oil level falls in the "Safe Zone," which is generally depicted by hash marks or two small holes in the dipstick. If you need to add more oil at this point, I'd recommend topping it off with no more than a 1/4-quart at a time, then checking again, and so on.
Once you're satisfied with the oil level, clean up your supplies, make sure the oil cap is tight, and shut your hood. You're done with the mechanical work now, and there's only two simple steps left.
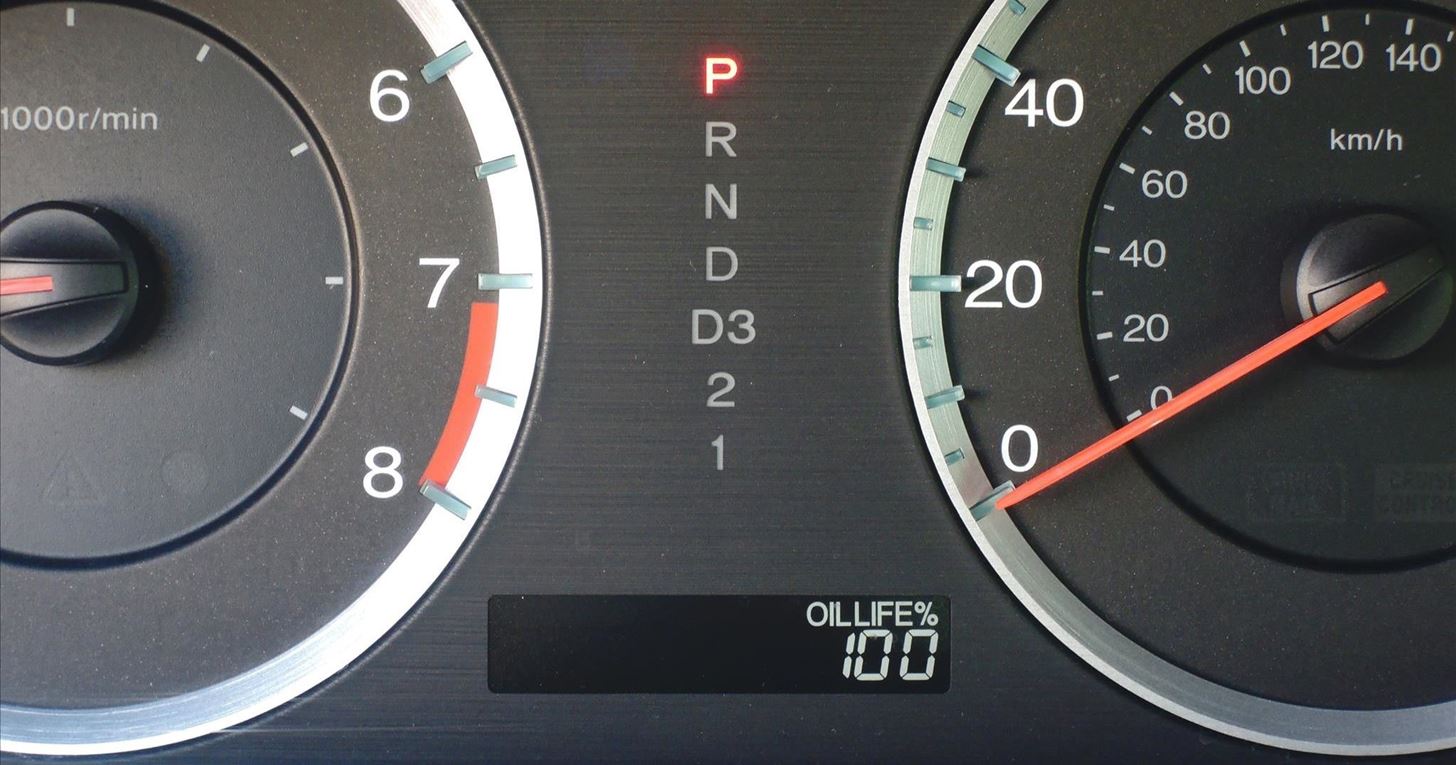
Step 12: Reset Your Oil Life Monitor
Next, if you own a car or truck that was manufactured in the last 10 years, chances are it has an oil life monitor. Despite the name, this system does not actually monitor your oil, so it doesn't know that you just added brand new oil and replaced the oil filter.
Essentially, the oil life monitor is just a timer that factors in miles driven, engine hours, and engine temperature to display an estimated percentage of oil life remaining. As such, you'll need to reset this timer manually. The process of resetting the oil life monitor varies greatly from car to car, so check your owner's manual to see how to reset yours.
Step 13: Dispose of Old Oil
Now that your oil change is completely done, you probably have about a gallon of oil and a dirty filter with no place to put any of it. Well start by pouring your old oil into the empty oil bottles, then wrap your oil filter in a few paper towels and place it in the box that your new oil filter came with, making sure that it's gasket-side up.
Next, take a quick trip to any local lube shop or auto parts store. The vast majority of these places will recycle your used oil and dispose of your used oil filter for free. Just make sure to go during business hours and get an employee from the shop to take your oil, and they'll gladly handle the rest for you.
Was your DIY oil change a rousing success, or did you run into any bumps along the way? Let us know in the comment section below.
Just updated your iPhone? You'll find new emoji, enhanced security, podcast transcripts, Apple Cash virtual numbers, and other useful features. There are even new additions hidden within Safari. Find out what's new and changed on your iPhone with the iOS 17.4 update.


1 Comment
very interesting, thank you
Share Your Thoughts